
Tuesday
Apr102012
tagged  Brisbane weddings, Gold Coast Make-up artist, Wedding Makeup, airbrush makeup, beach wedding ideas, hair and bridal makeup artist, hair makeup artist gold coast, mac makeup, makeup artist & hair stylist for weddings, mobile makeup artist gold coast, www.mobilebeautytoday.com.au in Airbrush makeup, Bridal Makeup, Corporate, Modeling Photo Shoots, Professional Resume, Weddings
Airbrush makeup, Bridal Makeup, Corporate, Modeling Photo Shoots, Professional Resume, Weddings
Reader Comments (1)
Makeup by Nicole Jensen
Makeup Artist & Hair Stylist 0402 188617
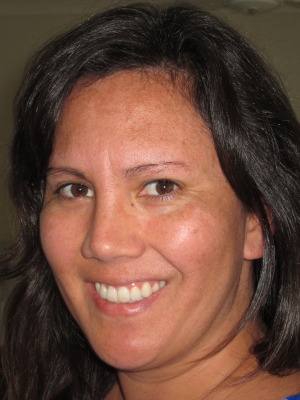
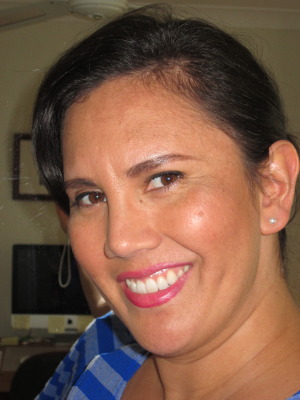
Both the foundation and cheek makeup have been applied by airbrush. As you can see from the before picture I usually have quite blotchy skin especially on my forehead but even so I like to keep my foundation minimal and really just use it to even out my skin tone while still being able to see my real skin. You can see how it has evened out my skin colour/tone while making my skin look quite luminous, glowy and fresh. Airbrush makeup can be built up so if I wanted a fuller coverage I would just keep applying layers. step by step this is what I did:
1#Applied primer
2#Applied TSZ airbrush foundation
3#Applied cheek colour temptu airbrush makeup
....allow to air dry fro about 5 minutes then
4#Apply powder and finish by putting on eyeshadow, mascara and lipstick.
Total time taken was about 15 minutes.
I use a SPAMAX gun and mini airbrush machine